Introduction
The previous article gave a general overview of memory management. The story goes on. In this section, let’s break into the heap memory to see how it works basically.
Memory allocator
We need to first understand some terminology in the memory management field:
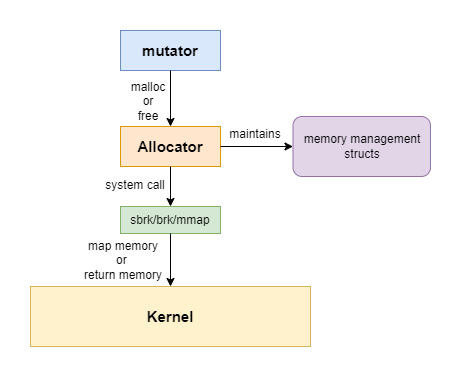
- mutator: the program that modifies the objects in the heap, which is simply the user application. But I will use the term
mutatorin this article. - allocator: the
mutatordoesn’t allocate memory by itself, it delegates this generic job to theallocator. At the code level, theallocatoris generally implemented as a library. The detailed allocation behavior is fully determined by the implementations, in this article I will focus on the memory allocator in the library ofglibc.
The relationship between the mutator and allocator is shown in the following diagram:
There is a third component in the memory management field: the garbage collector(GC). GC reclaims memories automatically. Since this article is talking about manual heap memory allocation in system programming, we will ignore GC for now. GC is a very interesting technical challenge, I will examine it in the future. Please keep watching my blog!
Hands-on demo
We will use gdb and pwndbg(which is a gdb plugin) and break into the heap memory to see how it works. The gdb provides the functionality to extend it via Python plugins. pwndbg is the most widely used.
The demo code is as follows:
1 |
|
The demo code above just allocates some memory, set the content of the memory and releases it later. And then allocate other chunks of memory again. Very simple, all right?
First, set a breakpoint at line 7(the first malloc call) and run the program in gdb. Then run vmmap command from pwndbg, which can get the process memory layout as follows:
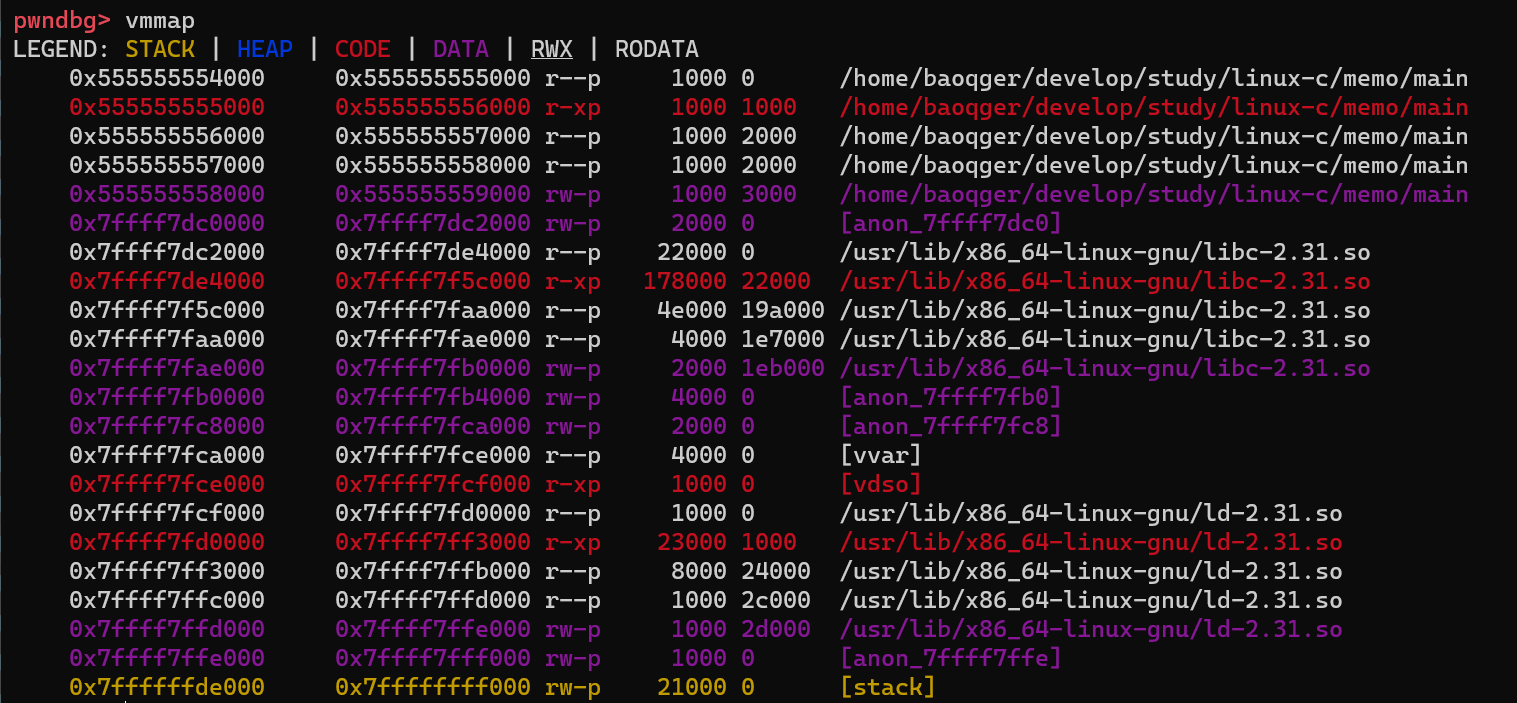
Note that there is no heap segment yet before the first malloc call is made. After step over one line in gdb, check the layout again:
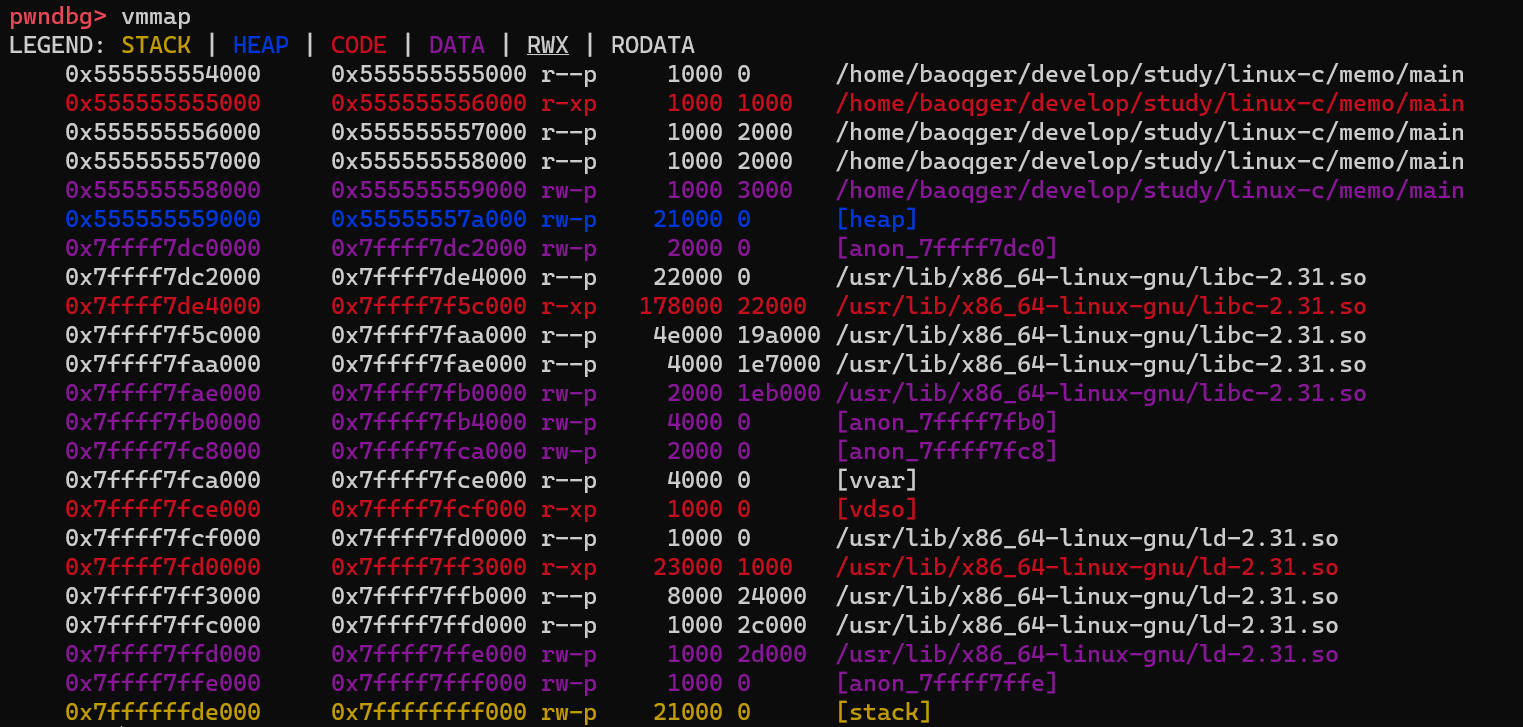
Now the heap segment is created with the size of 132KB(21000 in hexadecimal). As described above, the kernel maps 132KB of physical memory to this process’s virtual memory and marks this 132KB block of physical memory as used to isolate other processes. This mapping routine is done via system calls like brk, sbrk and mmap. Please investigate these system calls yourself.
132KB is much bigger than the 100B(the size passed to malloc). This behavior can answer one question at the beginning of this article. The system calls aren’t necessary to be triggered each time when malloc is called. This design is aimed to decrease performance overhead. Now the 132KB heap memory is maintained by the allocator. Next time the application calls malloc again, the allocator will allocate memory for it.
Next, step one more line in gdb to assign value(“AAAABBBBCCCCDDDD”) to the allocated block. Let’s check the content of this 132KB heap segment with heap command as follows:
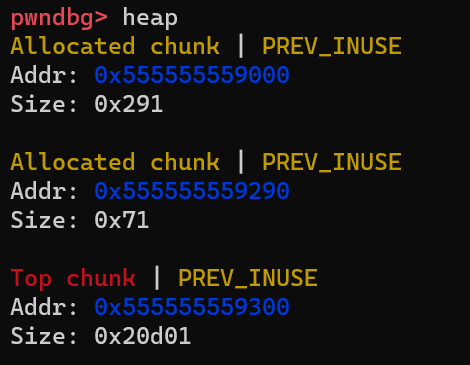
There are 3 chunks. Let’s examine these chunks one by one.
The top chunk contains all the remaining memories which have not been allocated yet. In our case, the kernel maps 132KB of physical memory to this process. And 100B memory is allocated by calling malloc(100), so the remaining memories are in the top chunk. The top chunk stays on the border of the heap segment, and it can grow and shrink as the process allocates more memory or release unused memory.
Then let’s look at the chunk with the size of 0x291. The allocator uses this chunk to store heap management structures. It is not important for our analysis, just skip it.
What we care about is the chunk in the middle with a size of 0x71. It should be the block we requested and contains the string “AAAABBBBCCCCDDDD”. We can verify this point by checking its content:
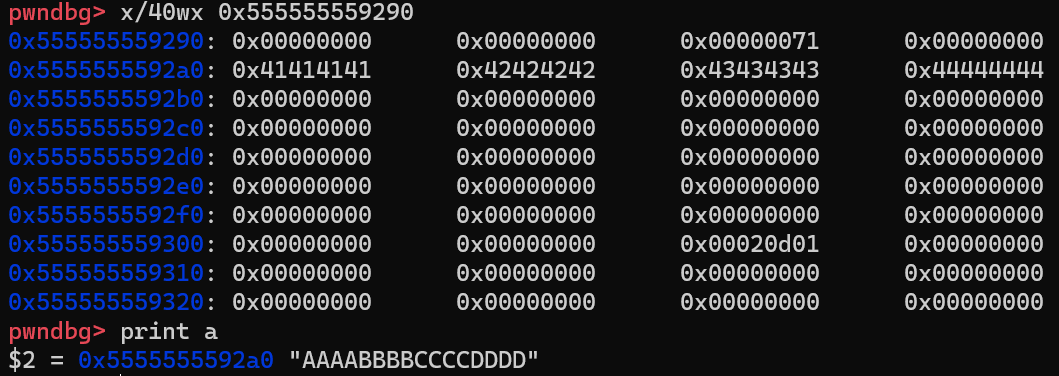
gdb’s x command can display the memory contents at a given address using the specified format. x/40wx 0x555555559290 prints 40 words(each word is 32 bits) of memories starting from 0x555555559290 in the hexadecimal format.
We can see that the string “AAAABBBBCCCCDDDD” is there. So our guess is correct. But the question is why the size of this chunk is 0x71. To understand this, we need to first analyze how the allocator stores chunk. A chunk of memory is represented by the following structure:
1 | struct malloc_chunk { |
prev_size: the size of the previous chunk only when the previous chunk is free, otherwise when the previous chunk is in use it stores the user data of the previous chunk.size: the size of the current chunk.fd: pointer to the next free chunk only when the current chunk is free, otherwise when the current chunk is in use it stores the user data.bk: pointer to the previous free chunk. Behaves in the same way as pointerfd.
Based on the above description, the following picture illustrates the exact structure of an allocated chunk:
1 | chunk-> +-+-+-+-+-+-+-+-+-+-+-+-+-+-+-+-+-+-+-+-+-+-+-+-+-+-+-+-+-+-+-+-+ |
- chunk: indicates the real starting address of the object in the heap memory.
- mem: indicates the returned address by
malloc.
The memory in between is reserved for the metadata mentioned above: prev_size and size. On a 64-bit system, they’re (type of INTERNAL_SIZE_T) 8 bytes in length.
For the size field, it is worth noting:
- It includes both the size of metadata and the size of the actual user data.
- It is usually aligned to a multiple of 16 bytes. You can investigate the purpose of memory alignment by yourself.
- It contains three special flags(
A|M|P) at the three least significant bits. We can ignore the other two bits for now, but the last bit indicates whether the previous chunk is in use(set to 1) or not(set to 0).
According to this, let’s review the content of this chunk again:
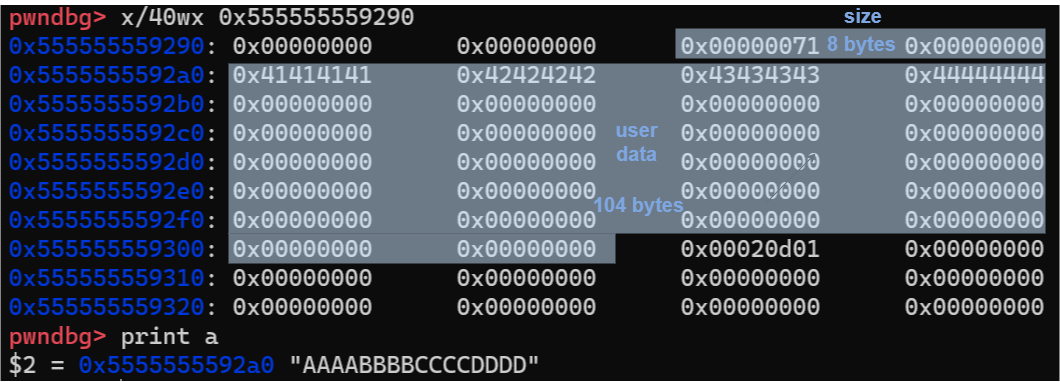
I add marks on the image to help you understand. Let’s do some simple calculations. 100 + 8 = 108, 100 is the size of memory we requested, 8 is the size of metadata(for size field). Then 108 is aligned to 112 as a multiple of 16 bytes. Finally, since the special flag P is set to 1, then we get 112 + 1 = 113(0x71)(that’s the reason why the size is 0x71 instead of 0x70).
In this section, we break into the heap segment and see how an allocated chunk works. Next, we’ll check how to free a chunk.